 +86 18030182217
 +86 18030182217
 sandydcsplc@gmail.com


Description
. Many products are not yet available. Please contact us to learn more about them
. In case of any inconsistency between the product model and the displayed picture, the model shall prevail. For specific product pictures, please contact us and we will take photos of the goods for confirmation
. We share multiple warehouses around the world, so please understand that it may take several hours to accurately return it to you. Of course, we will respond to your concerns as soon as possible
Product Core Brief
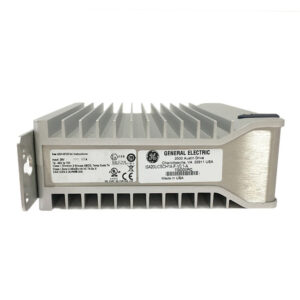
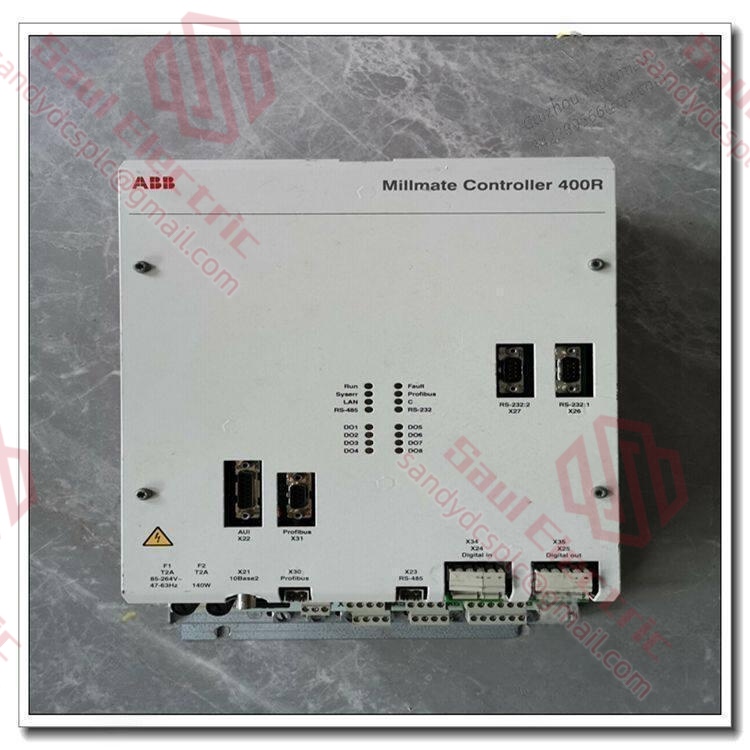
- Model: ABB PFXA401SF 3BSE024388R4
- Brand: ABB (Switzerland-Sweden)
- Series: ABB Motion Control / Servo Drive Systems (Legacy)
- Core Function: Digital servo drive controller for precise position, speed, and torque control of brushless/brushed motors. Condition: New Surplus, not refurbished.
- Type: Single-Axis Servo Drive Module
- Key Specs: 4.5 A Peak Current | Profibus-DP Communication | 24–48 V DC Input
Key Technical Specifications
| Parameter Name | Specification Value |
|---|---|
| Model Number | PFXA401SF |
| Order Code | 3BSE024388R4 |
| Input Voltage | 24–48 V DC (Nominal 24/36/48 V selectable) |
| Continuous Output Current | 2.5 A (Typical, dependent on cooling) |
| Peak Output Current | 4.5 A (Configurable via DIP switches) |
| Current Steps | 8-step DIP selection: 1.0, 1.5, 2.0, 2.5, 3.0, 3.5, 4.0, 4.5 A |
| Control Modes | Position, Speed, Torque (Switchable) |
| Communication | Profibus-DP (Standard), RS-232 (Service) |
| Feedback Types | Incremental Encoder, Resolver (Subject to config) |
| Digital Inputs | 7 channels (Configurable: Enable, Limit, Home, etc.) |
| Digital Outputs | 3 channels (Status, Error, Brake) |
| Analog Inputs | 2 channels (±10 V for Speed/Torque Ref) |
| Protection | Over-current, Over-voltage, Over-temperature, Short-circuit |
| Mounting | DIN Rail or Panel Mount |
Product Introduction
The ABB PFXA401SF 3BSE024388R4 is a high-performance digital servo drive designed for precise motion control in industrial automation applications. It supports three primary control modes—position, speed, and torque—allowing seamless switching between operational states to match complex machine cycles. With a configurable peak current output up to 4.5 A (set via onboard DIP switches), it drives a wide range of brushed and brushless servo motors found in packaging, converting, and robotic handling systems.Distinct from generic drives, the PFXA401SF integrates native Profibus-DP communication, enabling direct integration into ABB PLC networks without additional gateways. Its robust feature set includes 7 configurable digital inputs, 2 analog inputs for reference signals, and advanced protection against over-current and thermal overload. This specific suffix “R4” denotes the 4.5 A peak current hardware configuration, making it suitable for mid-range axis applications requiring dynamic response up to 400 Hz bandwidth. Note: As a legacy component, ensure your motor feedback type (encoder/resolver) matches the drive’s capability before installation.
Installation & Configuration Guide
Phase 1: Pre-Installation
⚠️ Safety First:
- Notify production of the planned downtime and Lock Out/Tag Out (LOTO) the main 24/48 V DC power supply.
- Verify safe state: Ensure the mechanical axis is blocked or supported to prevent gravity drops when the brake is released.
- Disconnect power: Remove voltage from the drive and motor cables. Wait 1 minute for bus capacitors to discharge.
- Check Motor Data: Have the motor nameplate data (Rated Current, Voltage, Encoder CPR) ready for configuration.
Tool Checklist:
- Anti-static wrist strap + mat
- Small flathead screwdriver (for DIP switches)
- Phillips screwdriver (PH1/PH2 for terminals)
- Multimeter (for voltage and continuity checks)
- Laptop with RS-232 adapter (for initial setup if Profibus is down)
- Smartphone (to photograph DIP switch settings and wiring)
Backup Procedures:
- Photograph:
- Existing DIP switch positions (Critical for current limit).
- Terminal wiring map (Power, Motor U/V/W, Encoder, I/O).
- Profibus address setting on the rotary switch (if applicable).
Phase 2: Removal
Steps:
- Label Cables: Tag every wire connected to the PFXA401SF (DC+, DC-, U, V, W, Enc, I/O).
- Disconnect Wiring:
- Loosen terminal screws counter-clockwise.
- Gently pull wires out. Do not pull by the insulation.
- Disconnect the Profibus DP connector carefully.
- Unmount Module:
- Release the DIN rail clip or remove panel mounting screws.
- Slide the module out.
- Inspect Connections:
- Check motor cable shielding. Broken shields cause noise and erratic movement.
- Verify encoder cable integrity.
⚠️ Crucial Notes:
- Motor Leads: Swapping any two motor phases (U, V, W) will cause the motor to run away or fault immediately. Mark them clearly.
- Encoder Polarity: Ensure encoder wires (A, /A, B, /B, Z, /Z) are not crossed.
Phase 3: Installation
Steps:
- ESD Protection: Wear your anti-static strap.
- DIP Switch Configuration (CRITICAL):
- Locate the 8-position DIP switch block on the front/side.
- Set the Current Limit according to your motor’s rated current. The PFXA401SF 3BSE024388R4 allows steps from 1.0 A to 4.5 A.
- Example: For a 2.2 A motor, set switches to the 2.5 A position (next highest standard step).
- Set control mode switches (Position/Speed/Torque) if hardware-selectable.
- Mount Module:
- Clip onto DIN rail or screw into panel.
- Ensure adequate airflow (leave 20 mm spacing above/below).
- Reconnect Wiring:
- Connect DC Power (24–48 V) to correct terminals. Polarity matters.
- Connect Motor Phases (U, V, W) matching labels.
- Connect Encoder shield to the designated ground terminal.
- Connect Profibus DP cable (ensure termination resistor is ON only if this is the last node).
- Grounding:
- Connect the drive’s PE terminal to the cabinet ground bar with a short, thick wire.
Self-Checklist:
- DIP switches set correctly for motor current.
- Motor phase sequence verified.
- Encoder shield grounded at drive end.
- Profibus termination resistor set correctly (ON at ends, OFF in middle).
- DC polarity verified (+ to +, – to -).
Phase 4: Power-On & Testing
Pre-Power Checks:
- Measure DC input voltage (should be 24–48 V DC).
- Measure resistance between motor phases (should be low, typically <10 Ω, and balanced).
- Check for shorts between Power and Ground.
Power-On Sequence:
- Apply DC Power: Turn on the 24/48 V supply.
- Observe LEDs:
- Green (Ready): Drive initialized, no faults.
- Red (Fault): Immediate hardware fault (Over-voltage, Encoder loss).
- Yellow (Enable): Waiting for enable signal.
- Enable Drive:
- Apply the “Enable” signal (usually 24 V to a specific digital input).
- Listen for the magnetic brake release (click sound).
- Jog Test:
- Send a low-speed jog command via PLC or HMI.
- Verify motor rotates in the correct direction.
- If reverse, swap two motor phases (power off first!).
- Tuning:
- Run a simple move profile.
- Monitor for overshoot or oscillation. Adjust gain parameters via software if necessary.
⚠️ Troubleshooting:
- Motor Vibrates/Hums: Check encoder connection. A lost encoder signal causes the drive to “hunt” for position.
- Fault on Enable: Likely a current limit mismatch or shorted motor cable. Re-check DIP switches and insulation.
- Profibus Comm Loss: Check the station address rotary switch and termination resistor. Ensure the GSD file in the PLC matches the drive firmware.
Frequently Asked Questions (FAQ)
Q1: How do I set the current limit on the PFXA401SF?
A: The 3BSE024388R4 model uses a physical 8-position DIP switch block to set the peak output current. You do not need software for this basic setting. Refer to the label on the drive cover; it lists the switch combinations for 1.0 A, 1.5 A, …, up to 4.5 A. Crucial: Always set the switch to the value equal to or slightly higher than your motor’s rated continuous current. Setting it too high risks motor burnout; setting it too low causes nuisance tripping during acceleration.Q2: Can I use this drive with a stepper motor?
A: No. The PFXA401SF is a true servo drive designed for closed-loop control with feedback devices (encoders or resolvers). It expects continuous position/speed feedback. Connecting a stepper motor (open loop) will result in immediate faulting or uncontrolled behavior. If you have a hybrid servo motor with an encoder, it might work, but parameter tuning will be difficult without specific stepper-emulation firmware which this legacy unit likely lacks.Q3: My Profibus connection keeps dropping. What should I check?
A: This is a common issue with legacy Profibus-DP devices. First, check the termination resistor. On a Profibus line, only the first and last devices should have the termination switch set to “ON”. All intermediate devices (including this drive) must be “OFF”. Second, verify the station address matches the PLC configuration exactly. Finally, inspect the purple Profibus cable for breaks, especially near the connector strain relief. Shielding must be continuous; a broken shield invites noise that kills communication.Q4: Is the 3BSE024388R4 obsolete? Can I replace it with a newer model?
A: The PFXA401 series is considered legacy. While functional units are still valuable for maintaining existing machines, ABB has migrated to the MicroFlex or Next Move families for new designs. Direct replacement is rarely “plug-and-play” due to differences in mounting dimensions, connector pinouts, and communication protocols. If you are replacing a failed unit in an old machine, finding a surplus PFXA401SF (like this one) is often safer and faster than trying to retrofit a new drive, which would require re-wiring and re-programming the PLC logic.Q5: The drive faults with “Over Temperature” even though the fan is running.
A: The PFXA401SF relies on conduction cooling through its baseplate and convection airflow. If the ambient temperature inside the cabinet exceeds 45°C, or if the heatsink fins are clogged with dust/oil, it will trip. Also, check the current DIP switch setting. If you set the current limit higher than the motor needs, the drive works harder than necessary, generating excess heat. Clean the heatsink and ensure cabinet fans are pulling air across the drive, not just circulating hot air inside.Q6: Do I need special software to configure this drive?
A: For basic operation (Current limit, I/O mapping), the DIP switches and jumpers handle most settings. However, for advanced tuning (PID gains, filter settings, complex motion profiles), you typically need the legacy ABB configuration software (often RS-232 based). If you don’t have the software cable, you can often run the drive in default “Velocity Mode” using the analog input (±10 V) for simple applications without deep programming. Just ensure the DIP switches match your analog mode requirement.
- WhatsApp: +86 18030182217
- Email: sandydcsplc@gmail.com
- Phone: +86 18030182217
- Wechat: +86 18030182217
- Website: www.xiongbaparts.com