 +86 18030182217
 +86 18030182217
 sandydcsplc@gmail.com


Description
. Many products are not yet available. Please contact us to learn more about them
. In case of any inconsistency between the product model and the displayed picture, the model shall prevail. For specific product pictures, please contact us and we will take photos of the goods for confirmation
. We share multiple warehouses around the world, so please understand that it may take several hours to accurately return it to you. Of course, we will respond to your concerns as soon as possible
Product Core Brief
- Model: ABB PFTL301E 3BSE019050R1000
- Brand: ABB (Switzerland-Sweden)
- Series: Web Tension Measurement – Mini Series Pillow Blocks
- Core Function: Measures horizontal web tension forces in rolling and converting lines. Condition: New Surplus, not refurbished.
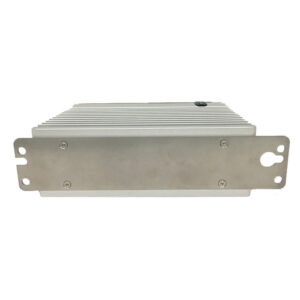
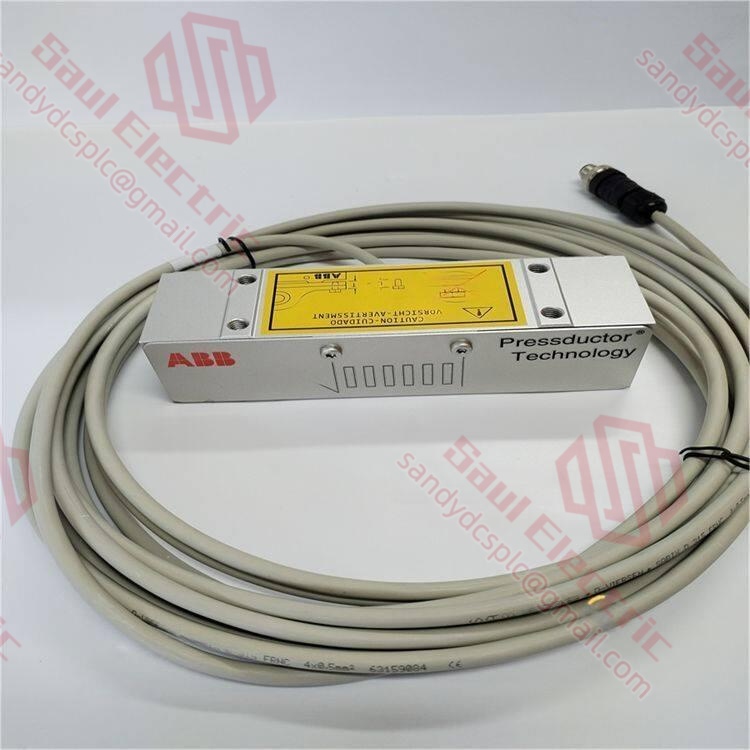
- Type: Horizontal Force Load Cell (Pressductor® Technology)
- Key Specs: 1.0 kN Rated Load | IP67 Protection | -40°C to +85°C Operating Range
Key Technical Specifications
| Parameter Name | Specification Value |
|---|---|
| Model Number | PFTL301E |
| Order Code | 3BSE019050R1000 |
| Rated Load (F.S.) | 1.0 kN (Horizontal Force) |
| Overload Capacity | 150% F.S. (Safe), 200% F.S. (Ultimate) |
| Measurement Principle | Pressductor® (Magneto-elastic effect) |
| Force Direction | Horizontal component only (ignores roll weight) |
| Non-Linearity | ≤ ±0.03% of Full Scale |
| Repeatability | ≤ ±0.02% of Full Scale |
| Operating Temperature | -40°C to +85°C |
| Protection Class | IP67 (Dust tight, water immersion resistant) |
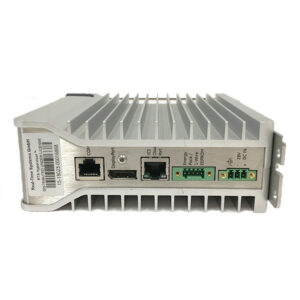
| Cable Connection | 6-core shielded cable (Standard 3m PUR) |
| Material | Alloy Steel with Nickel Plating |
Product Introduction
The ABB PFTL301E 3BSE019050R1000 is a horizontal mini-series pillow block load cell designed specifically for web tension measurement in paper, film, and foil processing lines. Utilizing ABB’s patented Pressductor® technology, it measures only the horizontal force component, effectively ignoring the weight of the tension roll to ensure high accuracy even with heavy rolls and low tension settings.Unlike strain gauge-based sensors, this unit contains no moving parts or active electronics inside the measuring element, resulting in zero drift and eliminating the need for periodic recalibration. Its robust IP67 rating and wide temperature tolerance (-40°C to +85°C) make it suitable for harsh industrial environments where moisture and temperature fluctuations are common. This specific model (1.0 kN) is ideal for medium-tension applications requiring precise control without signal noise.
Installation & Configuration Guide
Phase 1: Pre-Installation
⚠️ Safety First:
- Notify production of the planned downtime and lock out/tag out (LOTO) the main drive motor.
- Verify safe state: Ensure the web is cut or slackened, and tension rolls are supported mechanically if necessary.
- Disconnect power to the tension amplifier/controller cabinet.
- Wait 5 minutes for capacitors to discharge.
Tool Checklist:
- Anti-static wrist strap + mat
- Hex key set (Metric, typically 4mm/5mm for mounting bolts)
- Torque wrench (calibrated)
- Multimeter (for continuity and resistance checks)
- Smartphone (to photograph cable routing and mounting orientation)
- Cleaning solvent (isopropyl alcohol) and lint-free cloth
Backup Procedures:
- Photograph:
- Cable entry point and shielding ground connection.
- Mounting bolt positions and any shims used under the block.
- Orientation arrow on the sensor body (critical for horizontal force direction).
Phase 2: Removal
Steps:
- Support the Roll: Use a hoist or jack to slightly lift the tension roll, relieving pressure from the load cell. Do not let the roll hang by the cable.
- Disconnect Wiring:
- Open the junction box or amplifier terminal cover.
- Tag each wire according to the terminal number (Excitation+, Excitation-, Signal+, Signal-, Shield).
- Loosen terminals and gently pull wires free.
- Unmount the Block:
- Remove the four mounting bolts securing the PFTL301E to the machine frame.
- Carefully slide the sensor out from under the roll neck.
- Note: These units are heavy (alloy steel); use two hands or a lifting aid.
- Inspect Mounting Surface:
- Clean the machine frame surface. It must be flat and free of burrs. Uneven surfaces cause measurement errors.
⚠️ Crucial Notes:
- Direction Matters: The PFTL301E measures force in one specific horizontal axis. Note the arrow direction before removal. Installing it 180° reversed will invert your tension reading.
- Cable Strain: Do not pull on the cable to move the sensor. The cable entry is sealed; excessive bending can break the internal seal.
Phase 3: Installation
Steps:
- ESD Protection: While the sensor itself is passive, the connected amplifier is sensitive. Wear your anti-static strap when handling connectors.
- Orientation Check: Verify the force arrow on the PFTL301E points in the direction of the web pull.
- Mounting:
- Place the sensor on the clean mounting surface.
- Insert mounting bolts. Tighten in a cross-pattern to ensure even seating.
- Torque Spec: Tighten to manufacturer specification (typically approx. 40–50 N·m for M10 bolts, refer to mechanical drawing).
- Lower the Roll: Gently lower the tension roll onto the sensor. Ensure the roll neck sits squarely on the sensor surface.
- Reconnect Wiring:
- Connect wires to the tension amplifier terminals matching your tags.
- Shield Grounding: Connect the cable shield to the cabinet ground at one end only (usually the amplifier side) to prevent ground loops.
Self-Checklist:
- Sensor arrow aligns with web travel direction.
- Mounting bolts torqued correctly.
- No gaps between sensor and mounting surface.
- Cable shield grounded at one end only.
- No physical stress on the cable gland.
Phase 4: Power-On & Testing
Pre-Power Checks:
- Measure bridge resistance (Input/Output) with a multimeter. Typical values are around 300–500 Ω (check specific datasheet). Infinite resistance indicates a broken cable.
- Check insulation resistance (>100 MΩ at 500V DC) between cables and sensor body.
Power-On Sequence:
- Power up the tension amplifier/controller.
- Observe LEDs:
- Solid Green → Normal operation.
- Flashing Red/Orange → Signal out of range or wiring fault.
- Zero Calibration (Tare):
- With the web slack (no tension), perform a “Zero” or “Tare” function in the controller. This subtracts the pre-load caused by the roll weight (though PFTL301E ignores vertical weight, minor mechanical pre-loads exist).
- Functional Test:
- Apply slight manual force to the roll in the web direction. Watch the tension readout increase.
- Release force; reading should return to zero.
- Thread the Web: Run the machine at low speed. Verify tension readings match the setpoint.
⚠️ Troubleshooting:
- Reading Drifts: Check for mechanical binding. The roll must move freely horizontally against the sensor; if the frame is twisted, the sensor binds.
- Negative Reading: You likely installed the sensor 180° backwards. Swap the mounting orientation.
- Noise/Interference: Verify the shield is grounded at one end only. Check for VFD cables running parallel to the sensor cable.
Frequently Asked Questions (FAQ)
Q1: What is the difference between PFTL301E and PFCL301E?
A: This is a critical distinction. The PFTL301E (your model) measures horizontal tension forces only. It is designed so the weight of the roll does not affect the measurement. The PFCL301E measures vertical forces (including the roll weight). They are not interchangeable. If you replace a horizontal sensor with a vertical one, your tension readings will be wildly inaccurate due to the roll weight offset. Always check the “H” (Horizontal) vs “C” (Vertical/Combined) designation in the model code.Q2: Does the PFTL301E require periodic calibration?
A: One of the main advantages of the Pressductor® technology used in the PFTL301E is that it is inherently stable. Unlike strain gauges that drift over time due to material fatigue, the magneto-elastic effect does not drift. In my experience, unless the sensor is physically damaged or overloaded beyond 200%, it does not require annual recalibration. You only need to re-zero the system if the mechanical setup changes (e.g., different roll diameter or weight).Q3: Can I use this sensor in a washdown environment?
A: Yes. The PFTL301E 3BSE019050R1000 has an IP67 rating, meaning it is dust-tight and can withstand temporary immersion in water. It is commonly used in paper mills and food packaging lines where washdowns occur. However, ensure the cable gland and the connection point at the amplifier are also properly sealed. The stainless steel or nickel-plated alloy construction resists corrosion, but avoid using harsh acids that could attack the plating.Q4: My tension reading is non-linear or jumps erratically. What should I check?
A: First, verify the mechanical installation. The mounting surface must be perfectly flat; even a 0.1 mm gap or a burr can cause non-linearity because the force isn’t distributed evenly across the measuring elements. Second, check the cable. A partially broken shield or a loose terminal screw often causes “jumping” values. Finally, ensure you haven’t exceeded the 1.0 kN range. If the actual tension spikes above 1.5 kN (150% overload), the sensor may temporarily saturate or, in extreme cases, suffer permanent damage.Q5: Is the 3BSE019050R1000 obsolete? Can I still get replacements?
A: The PFTL301E series is a mature product line. While ABB continues to support it, specific stock levels fluctuate. The unit you are looking at is New Surplus, meaning it is genuine, factory-sealed, and never installed, but sourced from excess inventory rather than current production batches. This is often the best option for maintaining existing lines without upgrading the entire tension system. Just verify the firmware compatibility if your tension amplifier is very old (pre-2010), though the sensor itself is analog/passive and generally universal within the Pressductor family.Q6: How do I handle the cable if the length is insufficient?
A: Do not simply splice the wires with standard electrical tape. The signal is low-level analog (mV/V range), making it susceptible to noise. If you must extend the cable, use a dedicated 6-core shielded instrument cable with the same impedance characteristics. Perform the splice in a proper junction box, soldering the connections and insulating them with heat shrink. Maintain the shield continuity through the box, grounding it at the controller end only. Ideally, order a sensor with the correct cable length (3m, 6m, etc.) to avoid splicing entirely.
- WhatsApp: +86 18030182217
- Email: sandydcsplc@gmail.com
- Phone: +86 18030182217
- Wechat: +86 18030182217
- Website: www.xiongbaparts.com